I started this one on November 1st, as my first project whilst undertaking the challenge of crocheting every day in November for Bone Cancer Research Trust. In total I've managed to raise £463.13 (including Gift Aid and my employer's match funding) and did 45 hours across the 30 days (I slowed down at the end to not burn myself out)
If people want to contribute, the donation page is here - alternatively, people can just donate to the cause directly.
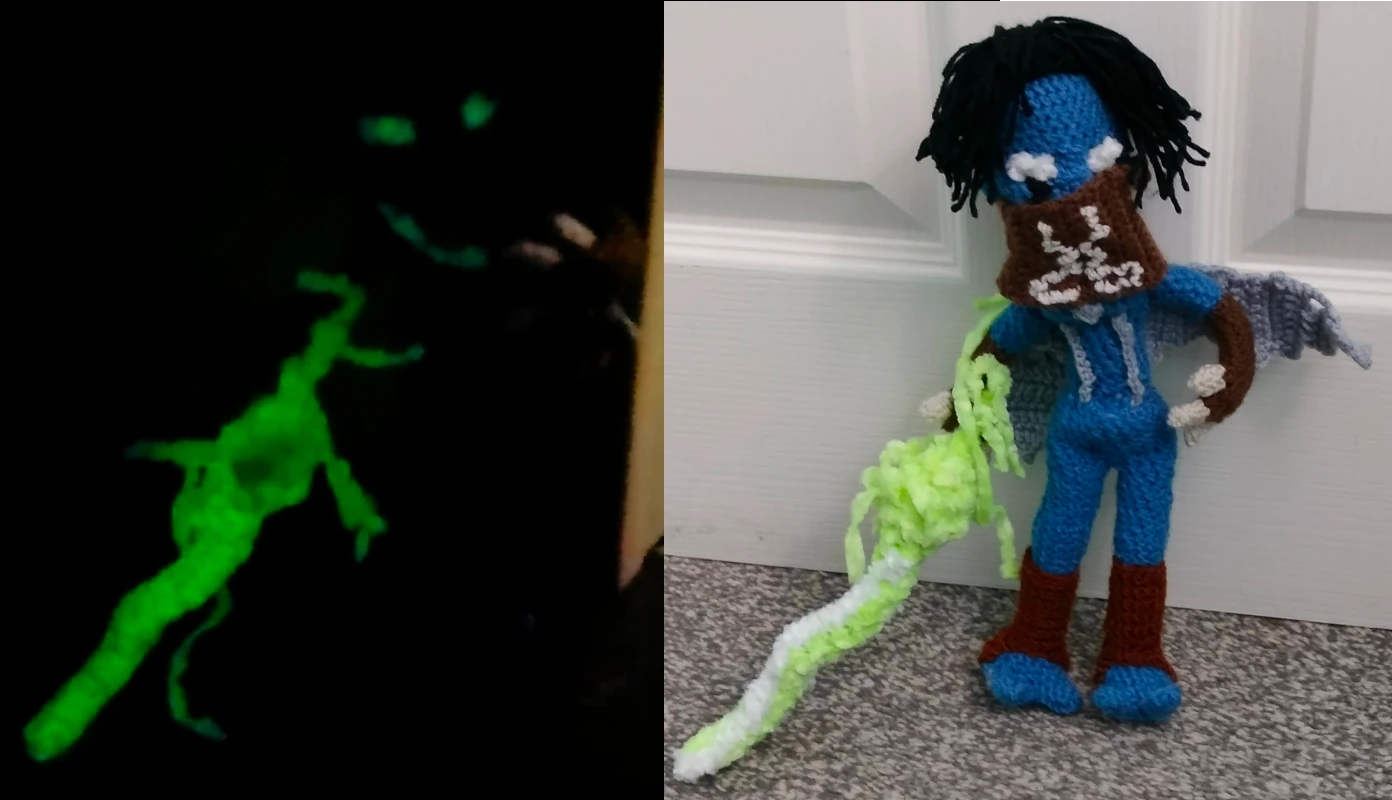 |
| Left: The doll, glowing in the dark. Right: The doll, in bright light |
Stats
The doll is 12 inches tall and just over 9 inches in wing-span. The Wraith Blade is 9 inches long and about 2 inches wide.
In total it took 39 hours across 19 days (so just over 2 hours a day), using 11 different yarns.
Posability
To ensure that the doll was posable, I used the wiring instructions detailed in Hoffman's "The Travellers" pattern. Well, roughly - she recommends a particular gauge of wire, but I just used what I had to hand. I don't know what gauge that is - it should probably be thicker (so it doesn't poke through the stitches as much) but it is also so thick that it was difficult to push through the stuffing. I should probably take this as a lesson to use less stuffing, but I won't.
Head
The head was a combination of the skull pattern I used for the Soul Reaver merged with the long & narrow head pattern I usually use.
I planned out the pattern - I would follow the usual pattern until round 13, then I would integrate the eyes. I would use black to go down the cheeks, do the nodes at round 15, then finish the face aspect at round 16.
For my first try I used some glow in the dark yarn I got from Temu for the eyes, but it ended up looking "goofy", for lack of a better word.
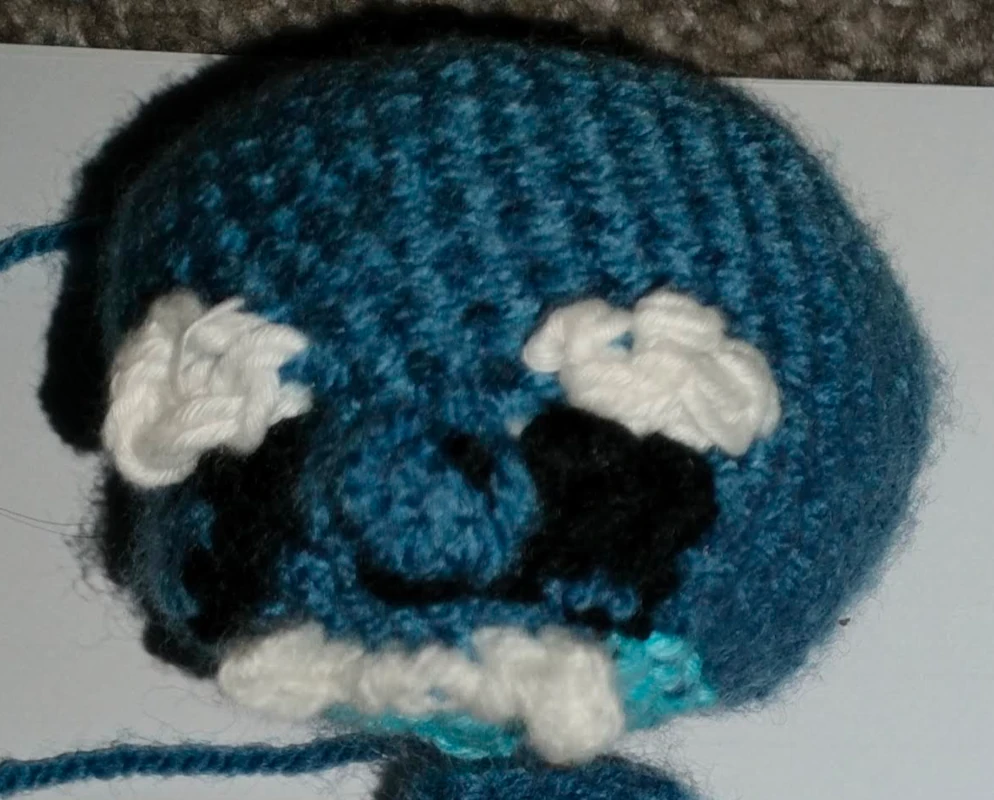 |
| The goofy head |
For the second try, rather than using the yarn directly when the skull pattern would say, I instead just used black. Afterwards, I used some yarn to pull the eye sockets through, to make some definition. Then I used some Lion Brand "Chenille"* Glow in the Dark yarn for the eyes. It ended up looking much better.
*Not actually Chenille, despite what they call it
Underneath, I used some glow in the dark blue yarn to give the hollow an ethereal glow. I used some "bone white" yarn for the teeth.
Much like with
Janos and
Kain, I used the adapted the standard ears by doing some hdc in the end to make them pointy.
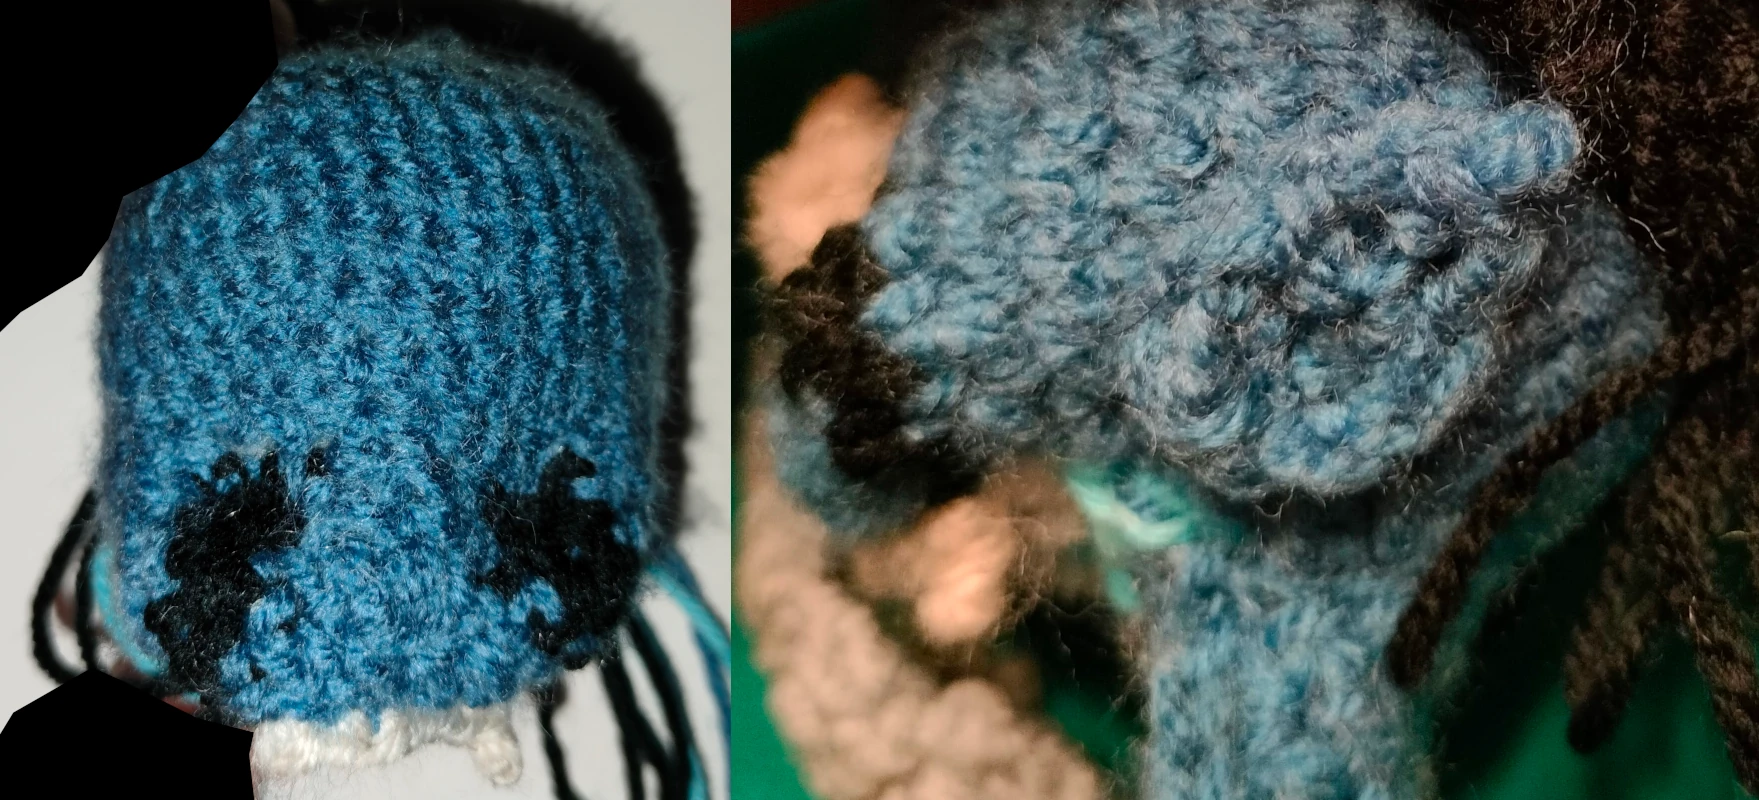 |
| Left: Head in progress. Right: Close up of the ear |
I followed Allison Hoffman's "The Wanderer's" pattern to do the nose and bridge, but it is very difficult to see, even with the naked eye.
Finally, I added on the black wig cap and hair. I considered using a wire brush, but thought that it would look too fluffy afterwards.
Body
The body was perhaps the most complicated part. Like the head, I planned this out ahead of time:
I followed the normal body pattern until round 4, then did an "ultra decrease" while still trying to allow room for the spine: BLO HDC2TOG 7 times, ch1, turn, then repeat that until only 2 stitches remain (on that line)
Rounds 5 - 16: sc into each st
Then reverse the end of round 4 until it's 24 stitches wide: FLO, 2sc into next 2 sts, ch1, turn, repeat until 24 sts
Then follow the rest of the pattern, but make sure to extend the neck to make up for the now missing rounds from the head pattern.
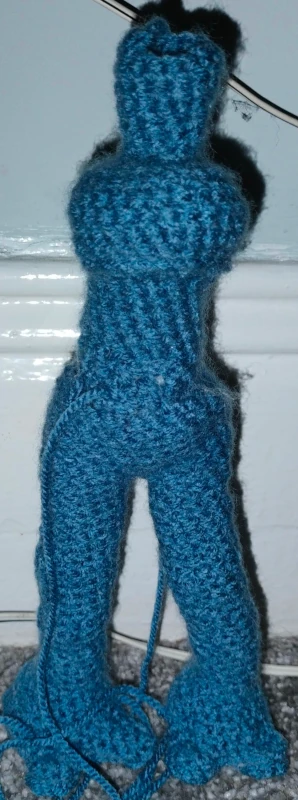 |
| The body in progress |
For detailing, like how I used spare yarn to sink the eye sockets, I used some to go from underneath the rib-cage to create the chest cavity. I also did the same on the pelvis, but that came after attaching the legs, and isn't as easy to see.
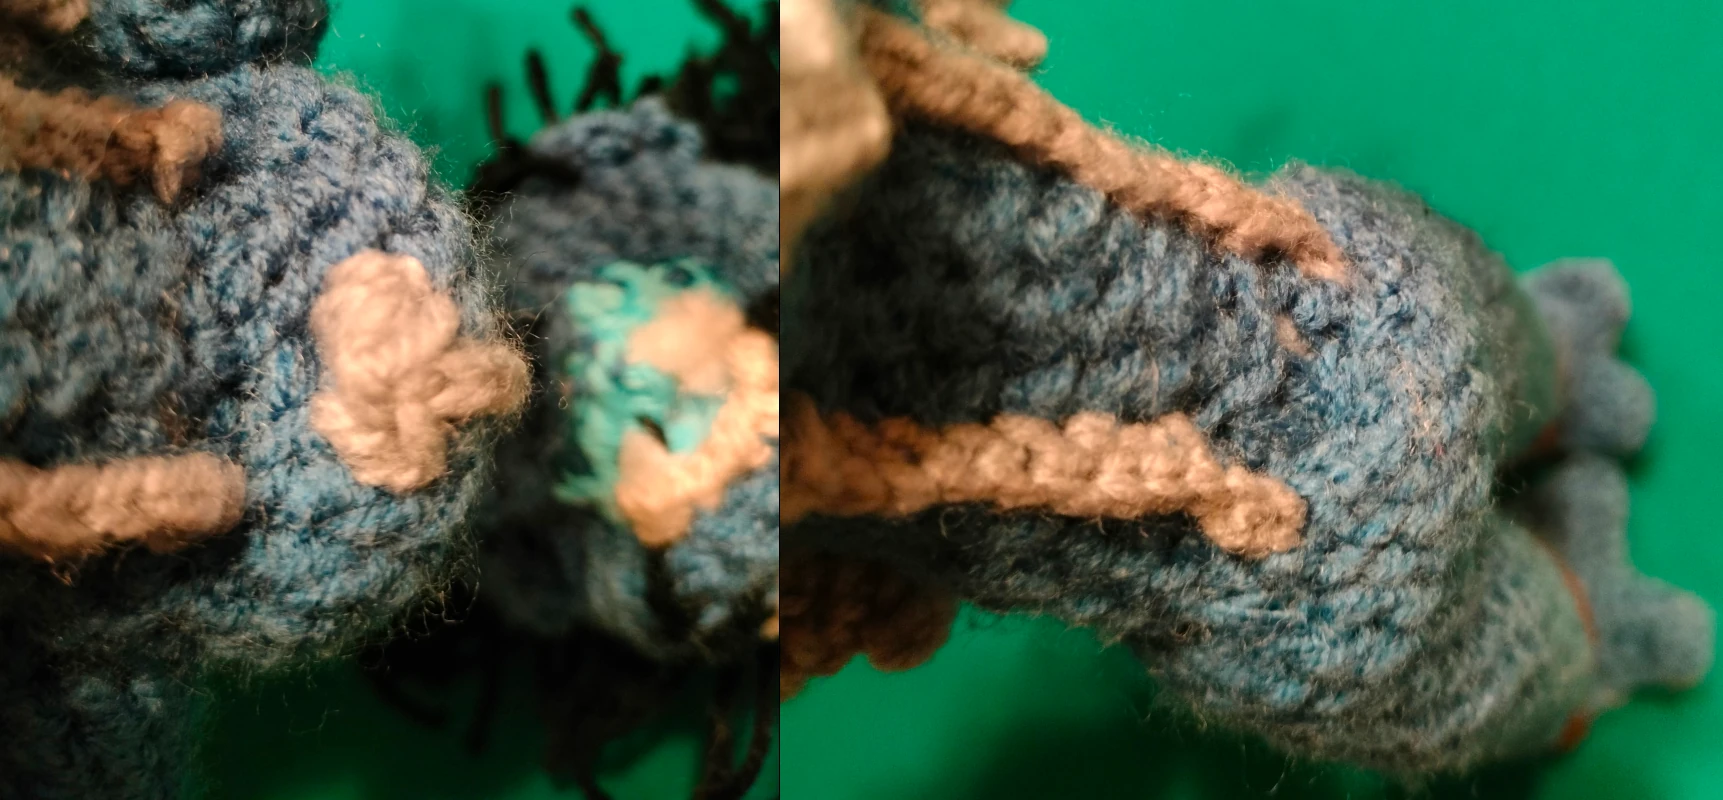 |
| Left: The chest cavity. Right: The pelvic cavity |
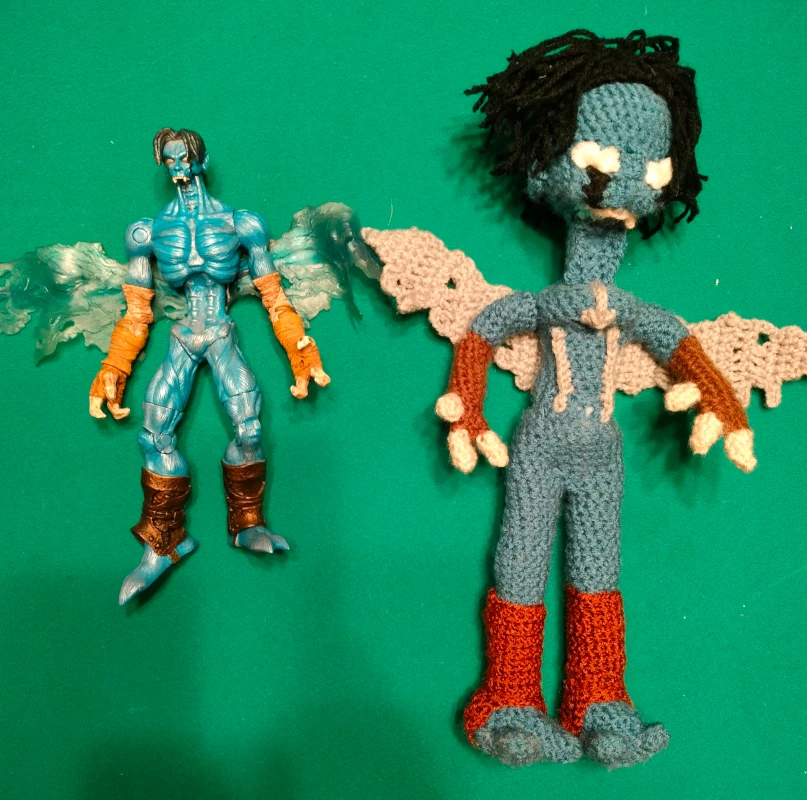
I used some silvery-blue yarn going up each side of the spine to imitate the design of the action figure, as well as to detail a breast-bone.
I used some of the normal blue yarn on each side of the neck to try to add in that detail, but it is once again very difficult to see.
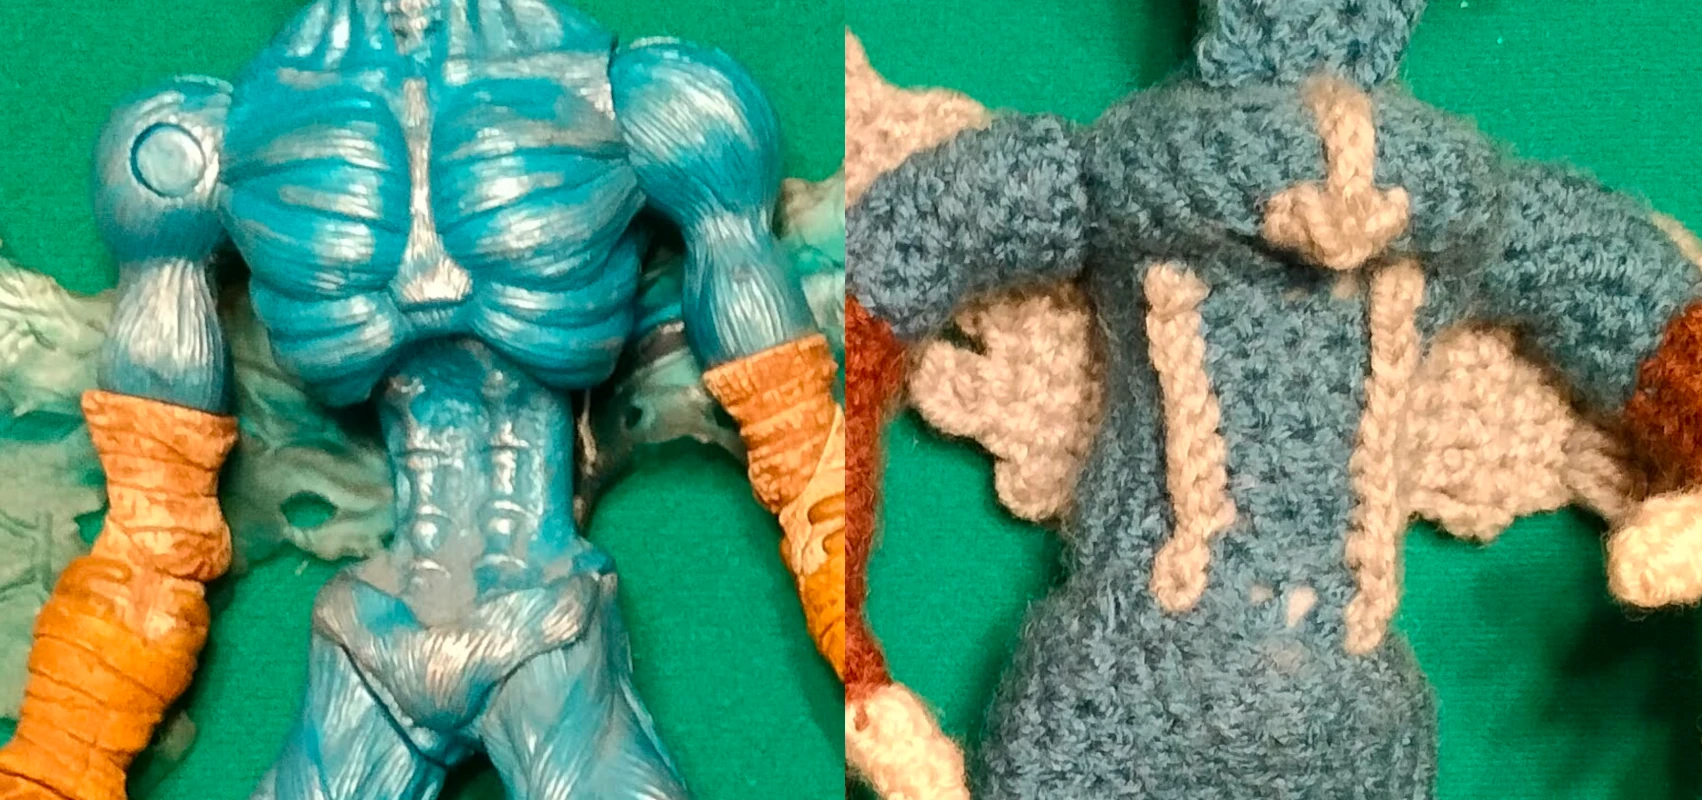 |
| Action figure (left) and doll (right) to compare the details |
Cowl
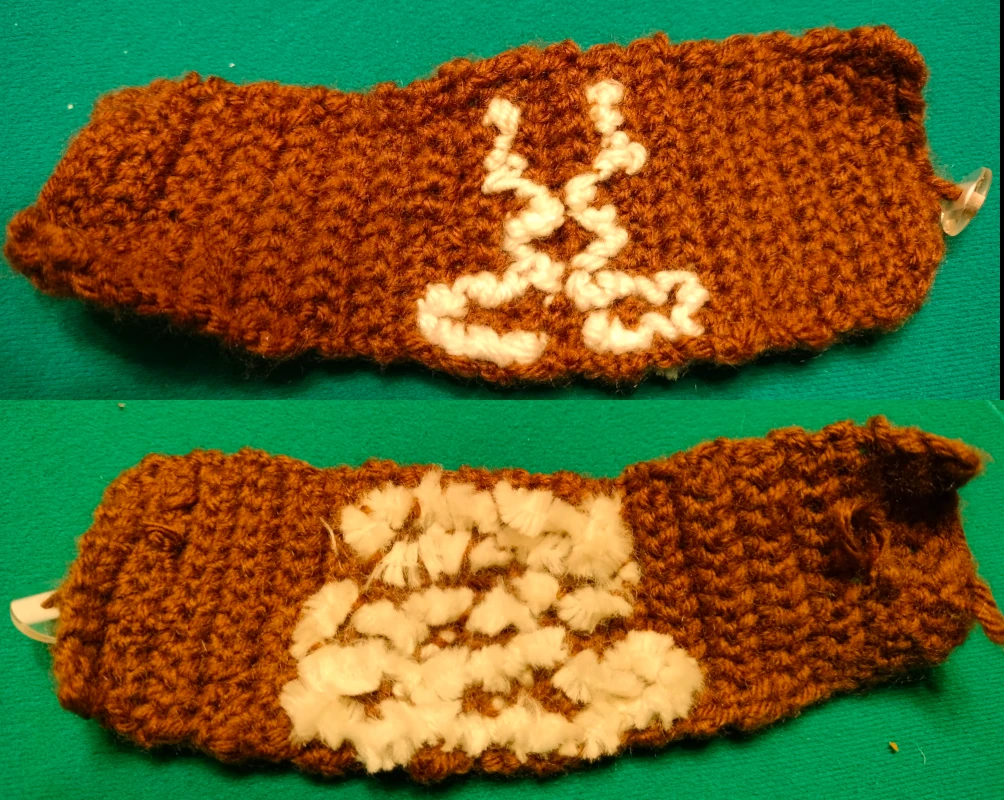
The cowl was made effectively just a brown rectangle, ensuring that it would cover the nose and down to the breast bone. I made it wider than it appears, and attached a button so that it can be used - it can stay on the doll or be removed.
I embroidered Raziel's symbol on the front - it's always difficult to do this with such an effectively "low resolution"
I also stitched a lot the same yarn I used for the eyes into the inside of it, because the blue on the underside of the head didn't glow very well, so this was my solution to get the desired effect.
Wings
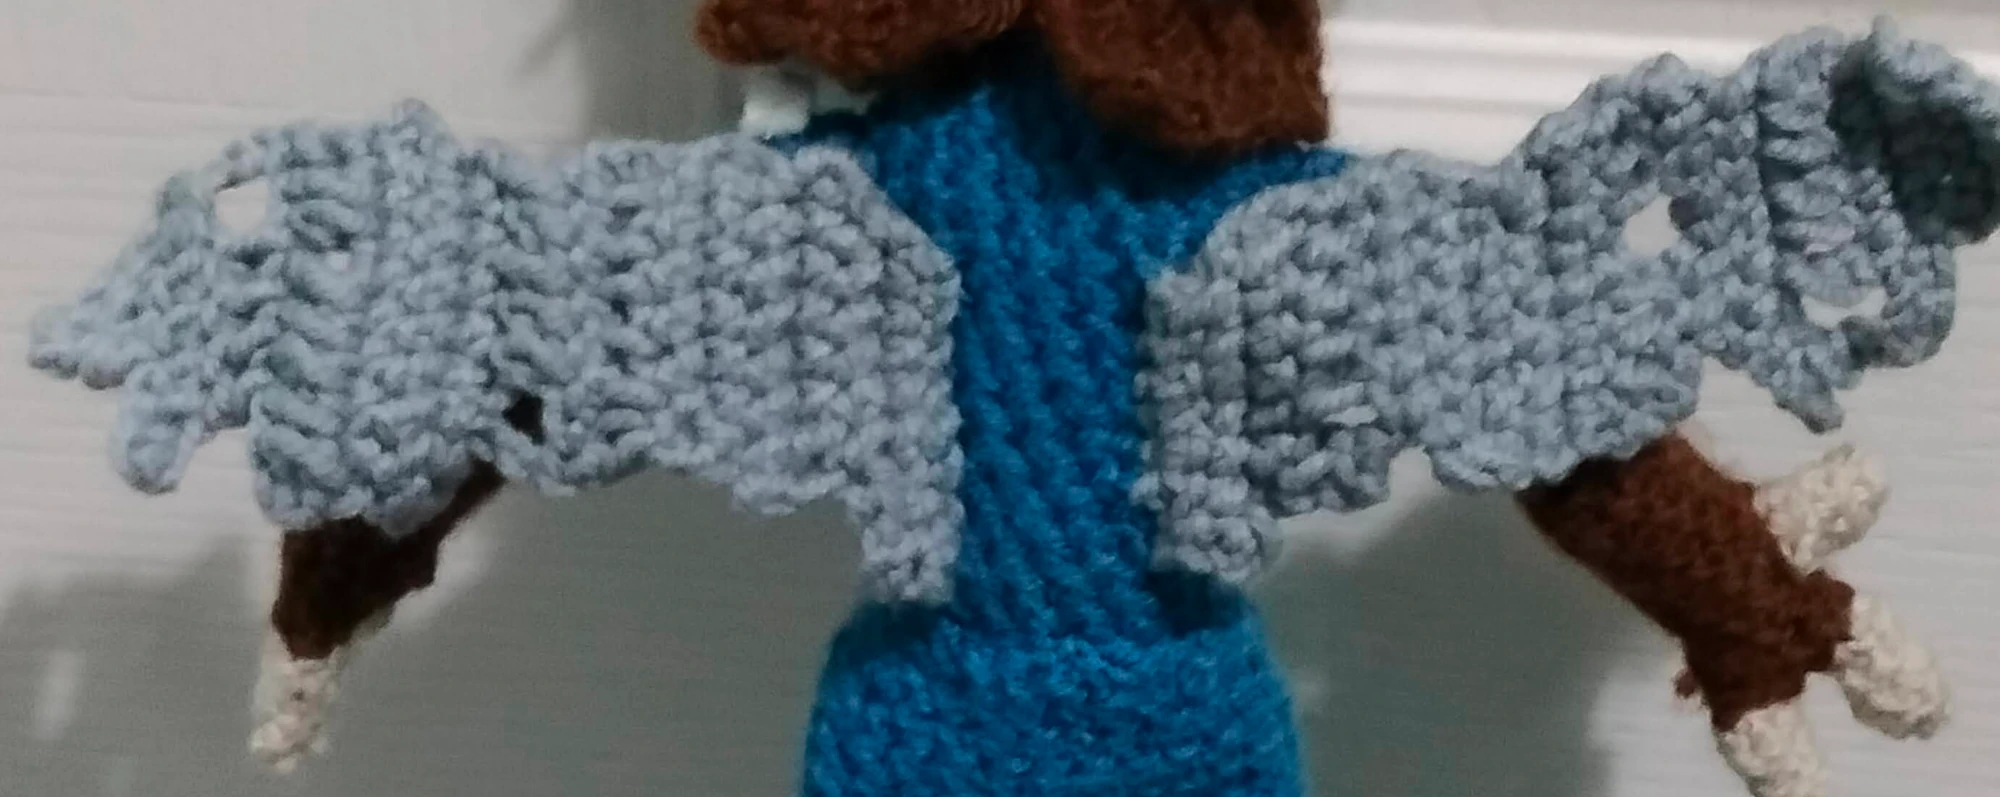
For the wings I used the silvery-blue yarn, stitched directly into the back of the body. It was effectively random - I was trying to follow the wings on the action figure - the holes needed to be random and the wings needed to be as long as the arms. It's another limitation of the "low resolution" of yarn that they look how they do.
Legs
For these I followed the same pattern I did for Janos and Kain. I didn't realise until after I was done that Raziel's greaves should have been a colour change - for some reason in my head they were a single plate strapped on, rather than something that wraps all the way around the legs.
For the greaves I used a bronze yarn, a rectangle that wrapped around the legs, then with some triangles and a strap along the bottom. Getting the rectangle the right size was nigh-impossible, but I hid the rougher parts on the back-inner-leg.
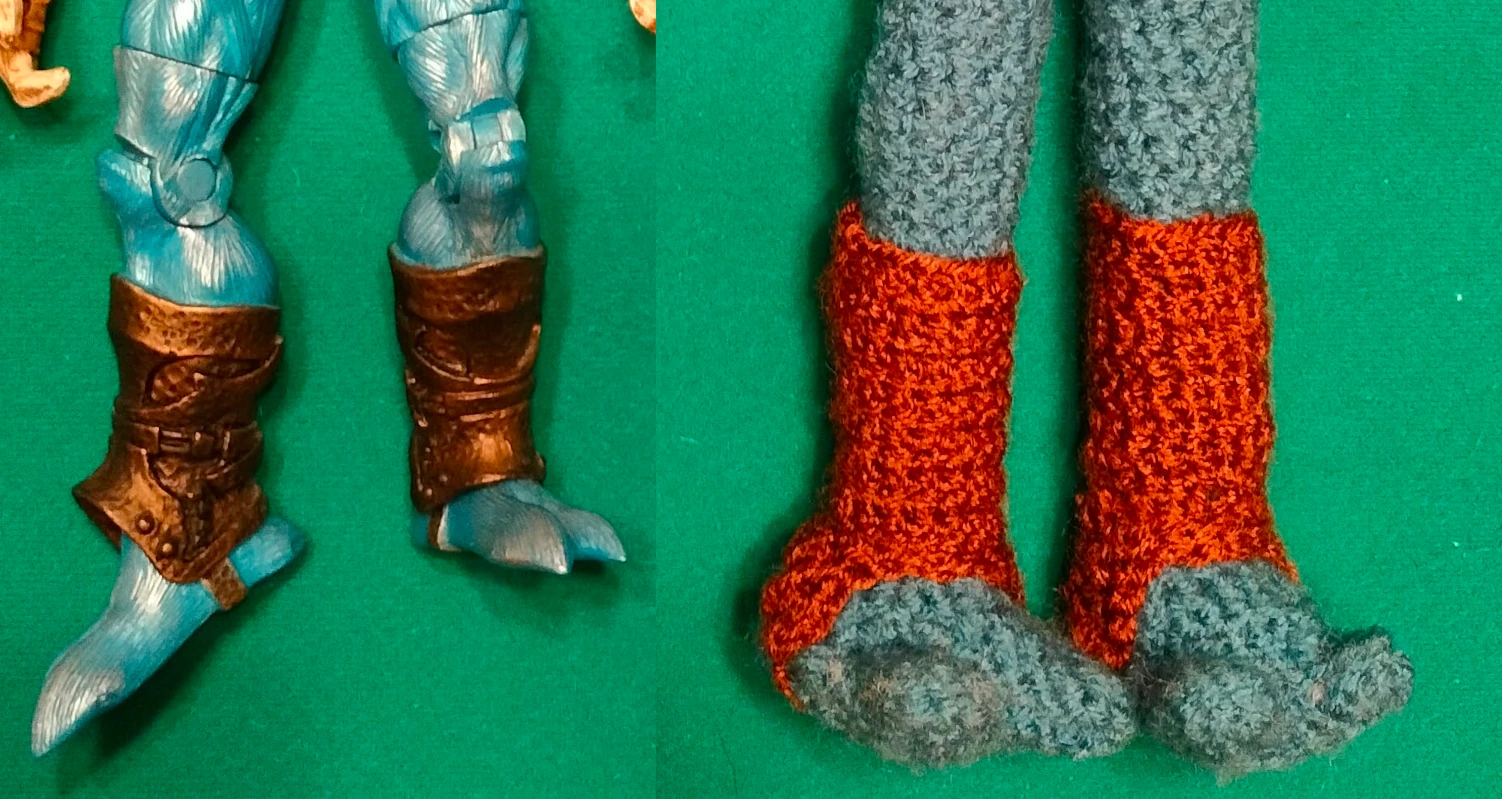 |
| Action figure (left) and doll (right) to compare greaves |
I tried to add some extra definition on the leg seam and pelvis, but pulling through oddments didn't look very good, and adding stitches with the silver-blue would have looked off. The action figure has flecks of that colour in the pelvis, but not to the degree that stitching some in would create.
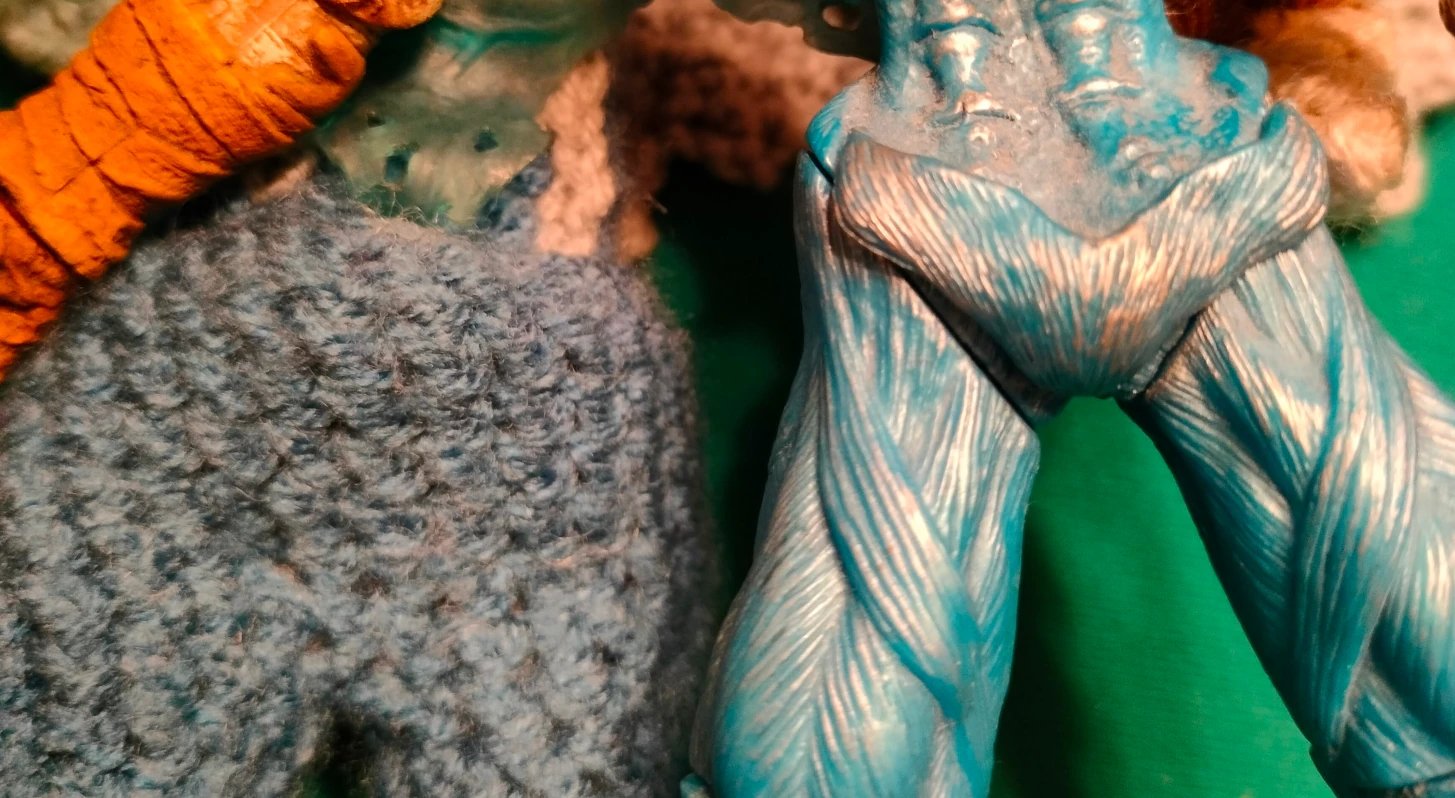 |
| Crotch comparison |
Arms
I used Hoffman's arms-with-fingers pattern, changing from blue to brown 1/3 of the way down, and joining two fingers together to make each claw (in bone-white). Both arms are on the same wire, meaning that they move together.
I should definitely use a different piece of wire for each, in future.
Wraith Blade
This was an adaptation of the previous
Soul Reaver pattern - I tried to start with the previously mentioned "Chenille"* (though in green this time) but it snapped after starting a magic ring. So instead I did the skull in white, and then threaded the green glow in the dark yarn through every. Single. Stitch.
*Still not actually Chenille
I didn't add features (eyes, teeth or nose) to the skull, because I thought they would definitely not be visible.
The blade was the same pattern, but using the green and white glow in the dark yarns.
The handle was more glow in the dark yarn wrapped around the wire that runs all the way through, with a bend at the top so it can hook onto the arm.
I tried to add some crests to the side of the skull, but the yarn was too difficult to deal with, so I left them out. As such it looks more like the blade from Soul Reaver 1 rather than Defiance.
I did, however, leave the those pieces of yarn in the head, so they could then wrap up Raziel's arm, like the energy of the blade from the games.




Comments