Commander Sterling
I've been keeping this one under my hat, a wee bit.
It's fair to say that I'm a fan of James Stephanie Sterling's work - I remember when they started publishing videos on the Escapist, and at first they weren't for me, though eventually I went back and got hooked.
Seeing their transformation, and hearing their explanation about it, has definitely helped me overcome a great degree of ignorance when it comes to LBGTQIA+ issues.
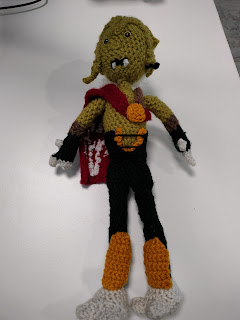
Since they started wrestling not just in England, but local to me, I wanted to make a doll of them to give as a present, which I managed to at the debut of Avant Garde wrestling:
On a separate note, it was my first live show - I may do a bit of a write up, though I'm not familiar enough with the art to go much further than "I enjoyed it!"
The doll itself is, like the other dolls I've made and intend to make, based upon the patterns in AmiguruME by Allison Hoffman.
The main differences to mention are:
- The Mask
- The Cape
- The Arms
- The Body
The Mask
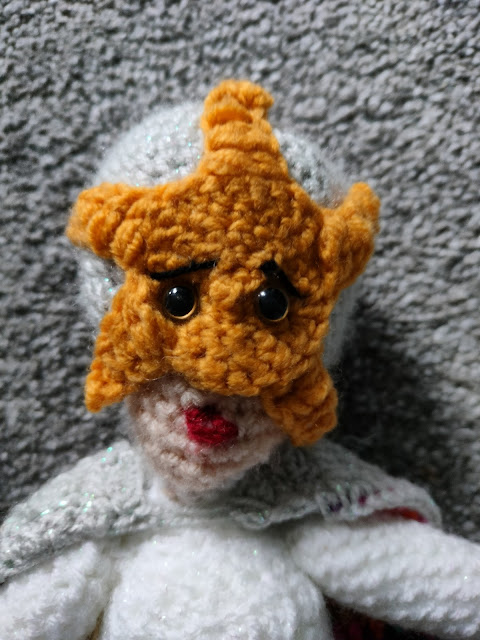
For the mask I followed the main wig cap pattern, but when I got to round 15 (around where the nose is) I would start with a ch1, reverse, inv dec, sc until the last two stitches, inv dec. I then kept decreasing until I ran out of space. The downside to this is that it neglects the chin strap, though that was difficult to see in the material I used as references.
After then squeezing that on top, I made a star out of some yellow yarn (the closest I had to gold) to stich in place. Attaching the safety eyes after this was nothing short of a nightmare, but I got there in the end.
The Cape
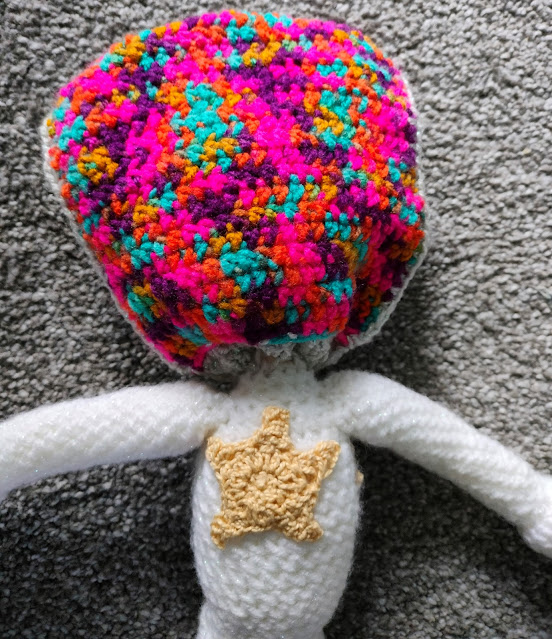
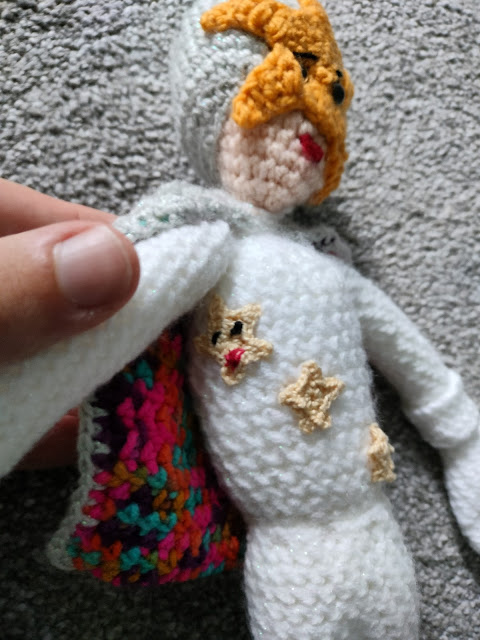
For this I effectively made two capes - one using a colourful rainbow-esque yarn I had (it would be lovely if there were some "space" yarn, but I thought it was nice and suitable) followed by the same in a metallic grey (to simulate silver).
I then stitched the two layers together, for the final effect.
I think I used the blazer pattern as a base, but just kept expanding outwards until it was wide enough, but I can't fully remember. I keep thinking that maybe I should have made the cape a bit longer, but I am happy enough with it.
The Arms
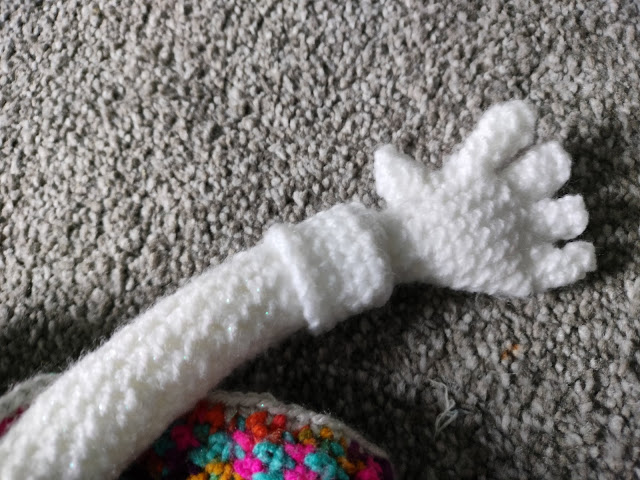
This was a major deviation - the arms in AmiguruME are rounded, without any fingers, and I wanted to branch out a bit. To do this, I followed the patterns from Edward's Crochet Doll Emporium by Kerry Lord. The issue was that the arms in that book are longer than those in AmiguruME, even before you factor in the fingers.
This taught me quite a lot about the nature of crochet - I tried using a smaller hook, for example, but I crochet so tightly that it doesn't make much of a difference. The overall size of the work is a combination of the size of the tools, the tension, the size of the yarn, and the number of rounds.
The arms ended up slightly too long, so in future I will try to cut out a few rounds. Either that, or use the (very misleadingly named) "traverse route" technique into future works where I want fingers. I suppose I could try to integrate them in more naturally, but the patterns in the books start from different ends of the arms, making that even more challenging.
When it came to the gloves I switched to a non-metallic white (a bit more on that later) and worked backwards a little bit in order to create the layered effect.
The Body
I followed the "curvy body" pattern, but largely ignored the pattern when it told me to decrease - this meant the breasts lost a bit of definition, so were I to try again I think I would try to increase everything proportionally.
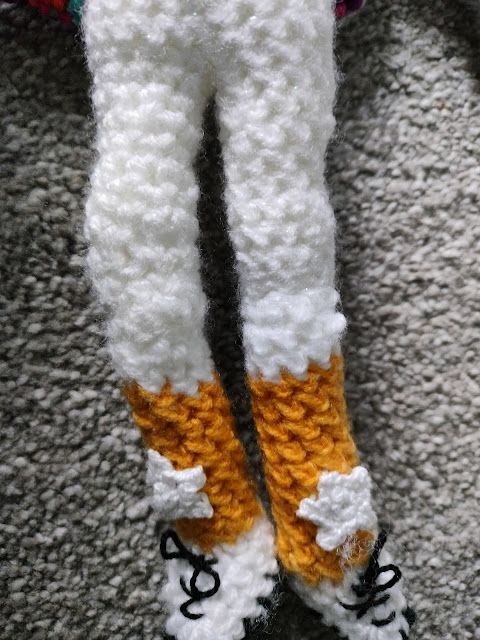
The majority of the body legs and arms are done in a metallic white, with other parts (gloves, boots) done in plain white, in order to represent their wrestling costume.
I did not realise when I started that the jumpsuit is actually grey, but so shiny it looks white in all of the videos and pictures that I had seen. Were I to try this again, I would change the body suit colour.
I put stars over the body, but the yellow I had used for the face-star was too thick to make stars that small. As such, I used some thin threads which were much paler, hence they are completely different colours. Once again, were I doing this again I would invest in matching colours for this.
Time taken
It's difficult to calculate the exact amount of time it took - I specifically remember being in the very early stages at the start of March, in the days surrounding my Granny's funeral. I can't remember exactly when I finished it - I showed it to people, but only on camera, so I cannot trace the exact date. I had definitely finished it by early to mid-June. So that was 13 weeks, round down to 10 for going to a conference etc, working for on average 8 hours a week (in the evenings and during lunch breaks at work), so in total at a guess it was 80 hours of work. No where near my current record of 2.5 years for Janos, but still a lot of work.
Before publishing this blog Steph tweeted about it, and the comments in the thread were heart-warming to read.





Comments